Speed Queen dryers are known for their durability, but occasional issues may arise. This guide provides step-by-step solutions to common problems, helping you restore functionality quickly and effectively.
1.1 Common Issues and Basic Solutions
Speed Queen dryers may face issues like not turning on, poor drying performance, unusual noises, or water leakage. Basic solutions include checking power supply, cleaning lint filters, inspecting vents, and ensuring proper connections. Regular maintenance, such as cleaning filters and checking for blockages, can prevent many problems. Addressing these common issues promptly helps maintain efficiency and prolongs the dryer’s lifespan. Always refer to the manual for specific guidance before attempting repairs.
1.2 Importance of Regular Maintenance
Regular maintenance is crucial for optimal performance and longevity of your Speed Queen dryer. Cleaning the lint filter after each use prevents clogs and reduces fire risks. Inspecting and cleaning exhaust vents annually ensures proper airflow and efficiency. Checking for worn parts and addressing minor issues early can prevent major repairs. Scheduling professional service periodically helps maintain the dryer’s functionality and safety, ensuring reliable operation for years to come. Consistent upkeep is key to avoiding costly breakdowns and extending the appliance’s lifespan.

Speed Queen Dryer Not Turning On
If your Speed Queen dryer won’t turn on, it may be due to power supply issues, a faulty door switch, or a malfunctioning thermal fuse or start switch.
2.1 Checking the Power Supply
Ensure the dryer is properly plugged into a functioning outlet. Verify that the circuit breaker hasn’t tripped and reset it if necessary. Use a multimeter to test the outlet’s voltage to confirm it’s providing the correct power. A damaged power cord can also prevent the dryer from turning on. Inspect the cord for any visible damage or wear and replace it if needed to restore power supply to the unit.
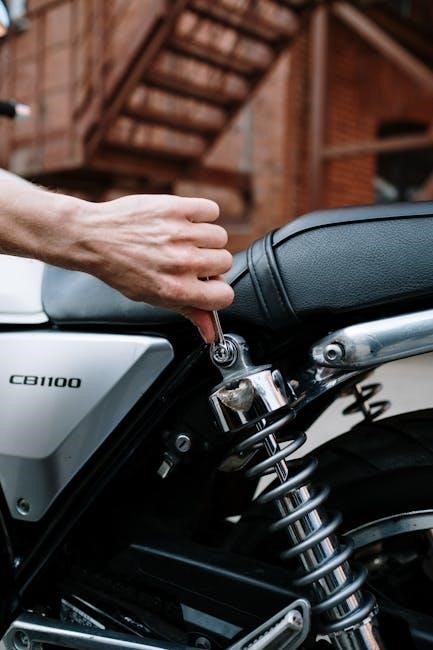
2.2 Inspecting the Door Switch
The door switch ensures the dryer operates only when the door is closed. Locate the switch by removing the lower panel. Use a multimeter to test for continuity when the door is closed. If the switch is faulty, it may prevent the dryer from turning on. Replace the switch if necessary. Ensure proper installation to restore functionality. Always unplug the dryer before performing any repairs to avoid electrical hazards. Consult a professional if unsure about the process.
2.3 Testing the Thermal Fuse
The thermal fuse is a safety device that stops power if the dryer overheats. Locate it on the blower housing or exhaust duct. Use a multimeter to check for continuity. If there’s no continuity, the fuse is blown and needs replacement. Ensure the dryer is unplugged before testing. A blown fuse often results from clogged vents or high heat buildup. Replace it with a compatible fuse to restore operation. Always follow safety guidelines when handling electrical components.
2.4 Verifying the Start Switch
To verify the start switch, ensure the dryer is unplugged for safety. Locate the switch, typically near the control panel. Use a multimeter to test for continuity while pressing the switch. If continuity is absent, the switch is faulty. Replace it with a compatible part. A defective start switch can prevent the dryer from turning on, so proper testing is crucial. Always use caution when handling electrical components and follow safety guidelines.
2.5 Examining the Timer and Control Board
Examine the timer by setting it to a specific cycle and observing if it advances. If it doesn’t, the timer may be faulty. Inspect the control board for visible damage or wear. Use a multimeter to check for continuity in connections. A malfunctioning timer or control board can prevent the dryer from starting or completing cycles. Replace any damaged components to restore functionality. Always unplug the dryer before performing these checks to ensure safety.
Speed Queen Dryer Not Drying Clothes Properly
If your Speed Queen dryer isn’t drying clothes properly, it could be due to clogged vents, a faulty heating element, or overloaded cycles. Regular maintenance helps resolve such issues efficiently.
3.1 Cleaning the Lint Filter
Cleaning the lint filter is essential for optimal dryer performance. Remove the filter after each use and wipe it with a cloth or brush to eliminate lint buildup. Soak it in water if heavily clogged. Regular cleaning prevents reduced airflow, longer drying times, and potential fire hazards. Ensure the filter is dry before reinstalling to maintain efficiency and safety. This simple step significantly improves your dryer’s functionality and reliability over time.
3.2 Inspecting and Cleaning the Exhaust Vents
Clogged exhaust vents reduce airflow, causing longer drying times and increased fire risks. To clean, detach the vent from the dryer and outside wall. Use a vacuum or brush to remove lint and debris. Ensure all connections are secure after reinstallation. Regular cleaning improves efficiency and safety. Annual maintenance prevents blockages and extends the dryer’s lifespan by ensuring proper ventilation and reducing strain on internal components.
3.3 Checking for Overloading
Overloading is a common cause of extended drying times. Excessive clothing restricts airflow, making the dryer work harder and increasing wear. Check your owner’s manual for capacity guidelines. Remove excess garments to ensure proper air circulation and heat distribution. Splitting large loads into smaller ones improves efficiency and prevents damage to both clothes and the dryer. Regularly monitoring load size helps maintain optimal performance and extends the appliance’s lifespan.
3.4 Troubleshooting Heating Elements
If your Speed Queen dryer isn’t heating, the issue may lie with the heating elements. Check for blown fuses or tripped circuit breakers, as these can prevent power from reaching the heater. Inspect the heating element for visible damage or wear, and test for continuity using a multimeter. If defective, replace the heating element. Ensure all connections are secure and free from corrosion. Proper maintenance and timely repairs can restore heat and efficiency to your dryer, ensuring clothes dry thoroughly in each cycle.
3.5 Fixing Faulty Moisture Sensors
Faulty moisture sensors can cause your Speed Queen dryer to overheat or fail to detect when clothes are dry. To fix this, clean the sensors with a damp cloth and white vinegar to remove residue. If cleaning doesn’t resolve the issue, the sensors may need replacement. Ensure proper installation and consult your manual for guidance. Regular maintenance of moisture sensors ensures accurate cycle control and prevents extended drying times, keeping your dryer operating efficiently and safely.
Speed Queen Dryer Making Noise
Unusual noises from your Speed Queen dryer can indicate issues like an uneven surface, worn drum bearings, or loose objects inside. Always check installation and components for faults.
4.1 Checking for an Uneven Surface
A Speed Queen dryer operating on an uneven surface can cause vibrations and noise. Ensure the dryer is installed on a level floor. Use a spirit level to verify balance. Adjust the feet by turning them clockwise or counterclockwise until the dryer sits evenly. An imbalance can lead to excessive noise and potential damage. If the floor is uneven, consider using anti-vibration pads to stabilize the appliance and reduce operational noise effectively.
4.2 Inspecting Drum Bearings and Rollers
Worn or damaged drum bearings and rollers can cause noise and vibration in your Speed Queen dryer. To inspect, unplug the dryer and remove the drum. Check the rollers for wear or debris and ensure they rotate smoothly; Inspect the drum bearings for signs of damage or corrosion. If damaged, replace the bearings or rollers using genuine Speed Queen parts. Proper maintenance of these components ensures quiet operation and prevents further damage to the dryer.
4.3 Identifying Rattling Objects
A rattling noise in your Speed Queen dryer may indicate loose objects inside the drum or debris from clothing. Check for coins, buttons, or other small items lodged in the drum or rollers. Remove any foreign objects and clean the area thoroughly. Ensure the drum is clear of obstructions before restarting the dryer. If the noise persists, inspect internal components like bearings or rollers for damage or misalignment.

Speed Queen Dryer Leaking Water
A leaking Speed Queen dryer can be caused by a damaged door gasket, blocked filters, or a faulty drain hose. Inspect the door seal for cracks or damage and replace it if necessary. Check the drain hose for kinks or blockages and ensure it is securely connected to both the dryer and the water supply. Regularly cleaning the lint filter and exhaust vents can also help prevent water leaks and maintain proper functionality.
5.1 Inspecting the Door Gasket
To address water leakage, inspect the door gasket for cracks, tears, or signs of wear. Ensure it is properly seated around the door opening. A damaged or misaligned gasket can cause water to escape during operation. If the gasket is faulty, replace it with a compatible part. Regularly check the gasket for mineral buildup or detergent residue, which can affect its seal. Cleaning it with a damp cloth can improve its performance and prevent future leaks.
5.2 Checking the Drain Hose
Inspect the drain hose for kinks, blockages, or damage. Ensure it is securely connected to both the dryer and the water supply. A damaged or improperly connected hose can lead to water leakage. Detach the hose and inspect for obstructions or mineral buildup. Use a flashlight to check for blockages inside the hose. If damaged, replace the hose with a compatible part. Ensure all connections are tight and free from corrosion to prevent future leaks.
5.3 Ensuring Proper Connections
Verify all connections, including the door gasket, drain hose, and water supply lines, to ensure they are secure and free from damage. A loose or damaged connection can cause water leaks. Inspect the door gasket for signs of wear or cracks and replace it if necessary. Check the drain hose for kinks or blockages and ensure it is properly connected to the dryer and water supply. Tighten any loose connections and replace worn-out seals to prevent further issues.

Regular Maintenance Tips
Regular maintenance is key to ensuring your Speed Queen dryer operates efficiently. Clean the lint screen after each use, inspect vents annually, and check for worn parts to prevent issues and extend lifespan.
6.1 Cleaning the Lint Screen
Cleaning the lint screen is a simple yet crucial maintenance task for your Speed Queen dryer. After each use, remove the screen and gently brush off lint with your hands or a soft cloth. For stubborn residue, rinse with water and allow it to dry before reinstalling. This ensures proper airflow, reduces drying times, and prevents potential fire hazards. Regular cleaning also improves energy efficiency and extends the dryer’s lifespan.
6.2 Inspecting and Replacing Parts
Regularly inspecting and replacing worn-out parts is essential for maintaining your Speed Queen dryer’s performance. Check the drum belt for cracks or wear and replace it if damaged. Inspect drum bearings and rollers for excessive noise or friction. If faulty, replace them promptly to avoid further damage. Additionally, ensure moisture sensors are clean and functioning properly. Refer to your user manual or consult a professional for accurate part replacements. Always unplug the dryer before performing inspections or repairs.
6.3 Scheduling Professional Service
If your Speed Queen dryer issues persist after troubleshooting, consider scheduling professional service. Certified technicians can diagnose and repair complex problems, such as faulty control boards or damaged heating elements. They use genuine parts and adhere to manufacturer guidelines, ensuring reliable fixes. Regular maintenance by professionals can also prevent future issues, extending your dryer’s lifespan. Use Speed Queen’s official support or trusted appliance repair services to book an appointment and keep your dryer running efficiently.

Error Codes and Solutions
Speed Queen dryers display error codes to indicate specific issues. Refer to your manual for code meanings, such as E1 for temperature errors or E2 for sensor malfunctions, and follow the recommended solutions to resolve the problem effectively.
7.1 Common Error Codes Explained
Speed Queen dryers use specific error codes to diagnose issues. Code E1 typically indicates a temperature sensor malfunction, while E2 points to moisture sensor problems. Code E3 may signal a faulty heating element, and E4 could indicate a communication error between components. Understanding these codes allows you to identify the root cause quickly. Always refer to your user manual for detailed explanations and recommended solutions to resolve the issue effectively and safely.
7.2 Resetting the Dryer
Resetting your Speed Queen dryer can often resolve minor issues. Start by ensuring the dryer is properly plugged in and the circuit breaker is on. Allow the dryer to cool for 30 minutes, then unplug it for 5 minutes. After unplugging, plug it back in and restart the dryer. If the issue persists, check for error codes or perform additional troubleshooting steps. Resetting is a simple first step to restore functionality without advanced repairs.