Discover the vibrant world of tie-dye with Tulip One-Step Tie-Dye Kits! Perfect for beginners‚ these kits offer easy-to-follow instructions to create unique‚ colorful designs on fabric.
Overview of Tie-Dye Tulip Process
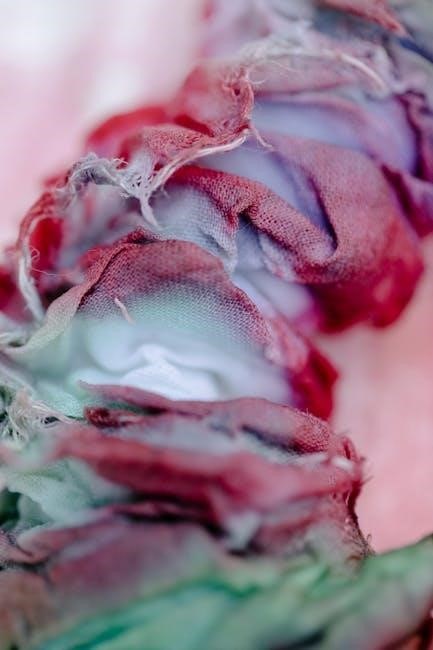
The Tulip tie-dye process involves a series of simple steps to achieve vibrant‚ long-lasting colors. Start by prewashing fabric to ensure optimal dye absorption. Next‚ bind the fabric using rubber bands or folding techniques to create unique patterns. Mix the Tulip One-Step Dyes according to instructions‚ then apply the dye evenly to the bound fabric. Allow the dye to set for 6–8 hours‚ following the recommended waiting time. Finally‚ rinse and wash the fabric to reveal the colorful design. This method ensures bright‚ washable results when instructions are followed carefully.
Importance of Following Instructions
Following the instructions carefully is essential for achieving the best results with Tulip tie-dye kits. The kits are designed to be beginner-friendly‚ but proper steps ensure vibrant‚ long-lasting colors. Deviating from instructions can lead to fading or uneven dye distribution. Adhering to the guidelines helps prevent common mistakes‚ such as insufficient waiting time or improper dye mixing. Even experienced users benefit from following the steps to maintain consistency and quality. By sticking to the instructions‚ you can unlock the full potential of the Tulip One-Step Tie-Dye Kit and enjoy professional-looking results.

Materials Needed for Tie-Dye Tulip
Gather essential supplies‚ including the Tulip One-Step Tie-Dye Kit‚ which contains dye‚ gloves‚ and rubber bands‚ along with protective gear like paper towels and buckets.
Tulip One-Step Tie-Dye Kit Components
The Tulip One-Step Tie-Dye Kit includes vibrant dye powders‚ reusable gloves‚ elastic rubber bands‚ and an instructional guide. Each kit provides enough dye for multiple projects‚ with colors that are washable and long-lasting. The gloves protect hands from stains‚ while rubber bands help create unique patterns by binding fabric. The comprehensive guide offers step-by-step techniques for various designs‚ ensuring a creative and successful tie-dye experience for both beginners and experienced crafters. This all-in-one kit simplifies the tie-dye process‚ making it accessible and fun for everyone.
Additional Supplies Required
Beyond the Tulip One-Step Tie-Dye Kit‚ you’ll need a few extra supplies for a successful project. A large bucket or container is essential for mixing dye and soaking fabric. Measuring cups and spoons ensure accurate dye preparation. Paper towels or old rags are handy for cleaning spills. Plastic gloves can prevent skin staining. A plastic bag or cover helps maintain warmth during the dye-setting process. Optional items like additional rubber bands or protective gear enhance creativity and convenience. Having these supplies ready ensures a smooth and enjoyable tie-dye experience.
Preparation Steps for Tie-Dye Tulip
Preparation involves prewashing fabric‚ securing it with rubber bands‚ and choosing between wet or dry techniques. Allow 6-8 hours for the dye to set properly.
Washing and Drying Fabric Before Dyeing
Washing and drying fabric before dyeing is essential to remove finishes and softeners that may interfere with dye absorption. Use a mild detergent without fabric softener and dry thoroughly in a dryer. This ensures the fabric is clean and moisture-free‚ allowing the dye to adhere evenly. Proper preparation helps achieve vibrant‚ long-lasting colors. Avoid using fabric softener‚ as it can repel dye. For best results‚ prewash and dry the fabric before starting your tie-dye project to ensure optimal color penetration and bonding.
Choosing the Right Fabric for Tie-Dye
Choosing the right fabric is crucial for successful tie-dye results. Natural fibers like cotton‚ linen‚ and rayon work best‚ as they absorb dye effectively. Avoid synthetic fabrics like polyester or nylon‚ as they may not hold the color well. Opt for light-colored or white fabrics to ensure vibrant dye visibility. Tight-weave fabrics create sharp‚ defined patterns‚ while loose-weave fabrics produce softer‚ more spread-out designs. Avoid fabrics with water-repellent treatments or finishes‚ as they can hinder dye absorption. Selecting the appropriate fabric ensures optimal color retention and a professional finish for your tie-dye project.

Binding Techniques for Tulip Tie-Dye
Explore folding‚ twisting‚ and rubber band methods to create unique patterns. Wet or dry fabric techniques yield distinct designs‚ ensuring vibrant color distribution and artistic results.
Folding and Rubber Band Techniques
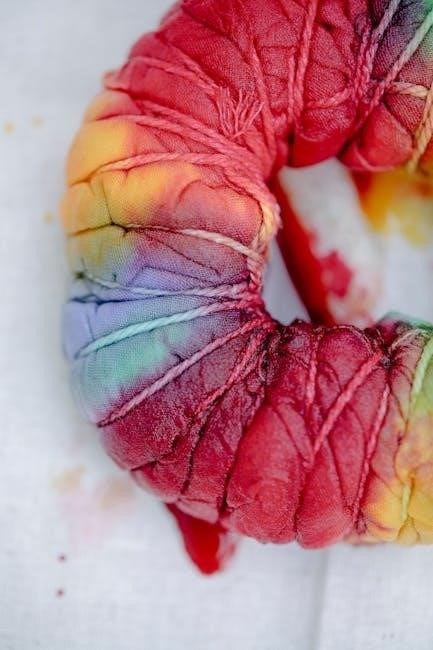
Folding and rubber band techniques are essential for creating unique tie-dye patterns. Start by folding fabric into desired shapes‚ such as accordion pleats or spirals. Secure folds with rubber bands to resist dye penetration. For wet folding‚ apply dye directly to damp fabric‚ while dry folding allows for precise control. Experiment with tight or loose bands to achieve sharp or soft color transitions. These techniques ensure vibrant‚ personalized designs‚ making every project distinct and artistic. Proper binding is key to achieving the desired visual effects in Tulip tie-dye creations.
Wet vs. Dry Fabric Binding Methods
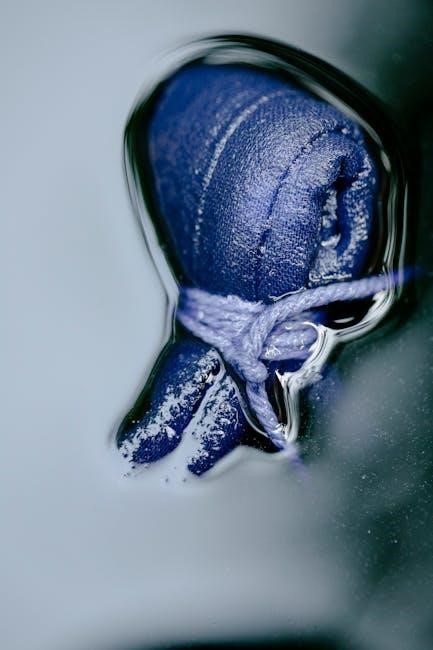
Wet and dry fabric binding methods yield distinct results in tie-dye. Wet binding involves folding and securing fabric while damp‚ allowing dye to seep deeply for softer patterns. Dry binding‚ done on completely dry fabric‚ offers crisp‚ sharp designs. Tulip One-Step Tie-Dye Kits work well with both techniques. Wet fabric is ideal for flowing‚ organic looks‚ while dry fabric suits intricate folds and precise color control. Choose the method that aligns with your desired design‚ ensuring vibrant and long-lasting colors. Proper binding ensures the dye sets evenly for professional-looking results.
Applying the Dye
Mix Tulip One-Step Dyes as instructed‚ then apply to crumpled fabric; Use one color or multiple for unique effects‚ ensuring vibrant results with proper application techniques.
Mixing Tulip One-Step Dyes
To achieve vibrant colors‚ mix Tulip One-Step Dyes according to the packaging instructions. Shake the dye bottles thoroughly before use to ensure the powder is fully dissolved. Wear gloves to avoid staining your hands. Mix the dye in a well-ventilated area‚ and avoid inhaling the powder. For best results‚ mix the dye just before application to prevent it from thickening. Use the exact measurements recommended to maintain the dye’s potency. Avoid over-diluting‚ as this can result in faded colors. Once mixed‚ apply the dye immediately to your folded or bound fabric for optimal absorption and color intensity.
Applying Dye to Fabric
Apply Tulip One-Step Dye directly to your folded or bound fabric using the squeeze bottles. For even coverage‚ squirt the dye thoroughly onto both sides of the fabric. Work in sections to ensure saturation without over-soaking. Wear gloves to protect your hands from staining. Use a paper towel to blot excess dye if needed. Cover your work surface with plastic or newspaper to prevent spills. Allow the dye to set for 6-8 hours‚ or longer for deeper colors‚ before rinsing. Avoid moving the fabric during this time to ensure vibrant results.
Setting and Waiting
Let the fabric sit for 6-8 hours or overnight to allow the dye to fully set. Keep it in a warm‚ dry place for optimal color vibrancy.
Recommended Waiting Time for Dye
For optimal results‚ allow the dye to set for at least 6-8 hours or overnight. This ensures vibrant colors and proper bonding with the fabric. Keep the dyed fabric in a warm‚ dry place away from direct sunlight during this time. Avoid rinsing prematurely‚ as this can weaken the color intensity. Allowing the dye to fully set is crucial for achieving long-lasting‚ washable designs. Patience is key to unlocking the best possible outcome for your tie-dye project.
Optimal Temperature for Dye Setting
The ideal temperature for dye setting is around 70°F (21°C). This ensures the dye binds properly to the fabric‚ resulting in vibrant and long-lasting colors. Avoid placing the dyed fabric in direct sunlight or near heat sources‚ as excessive heat can cause over-setting and fade the colors. Keep the fabric in a warm‚ stable environment during the waiting period. Maintaining the right temperature is essential for achieving the desired color intensity and durability in your tie-dye project.
Rinsing and Washing
Rinse gently under cold water to remove excess dye‚ then wash separately in cold water with mild detergent. This preserves vibrant colors and prevents fading.
Proper Rinsing Techniques
Rinse your tie-dye project gently under cold running water until the excess dye is removed and the water runs clear. Avoid using hot water‚ as it may cause colors to bleed. Do not wring or twist the fabric‚ as this can damage the material or disrupt the dye pattern. Instead‚ gently squeeze out excess water. Proper rinsing ensures vibrant‚ long-lasting colors and prevents dye from fading quickly. This step is crucial for maintaining the integrity of your design and achieving professional-looking results.
Washing Instructions After Dyeing
After rinsing‚ wash the dyed fabric separately in cold water using a mild detergent. Turn the garment inside out to protect the design. Avoid using fabric softeners or bleach‚ as they can damage the colors. Gently agitate the water to clean the fabric without scrubbing. Do not soak the fabric for extended periods. Once washed‚ remove excess water without wringing. Air-dry the fabric away from direct sunlight to preserve the vibrancy of the colors. Proper washing ensures the tie-dye design remains bright and intact for a long time.

Tips for Achieving Vibrant Colors
Follow instructions closely‚ mix dyes just before use‚ and let fabric sit in a warm place for 24 hours to ensure bold‚ long-lasting results.
Following the instructions carefully is crucial for achieving the best results with Tulip tie-dye. Properly mixing dyes‚ securing fabric with rubber bands‚ and allowing adequate setting time ensures vibrant‚ long-lasting colors. Deviating from the guidelines can lead to faded or uneven patterns. It’s also important to prewash fabric and avoid rushing the process. Patience and attention to detail are key to creating unique‚ professional-looking designs. By sticking to the steps‚ you’ll unlock the full potential of your tie-dye project and enjoy durable‚ washable colors.
Common Mistakes to Avoid
When using Tulip One-Step Tie-Dye Kits‚ avoid common mistakes like not prewashing fabric‚ which can prevent dye absorption. Overmixing or undermixing dyes can lead to uneven colors. Waiting too long to apply dye after mixing reduces effectiveness. Incorrect rubber band placement may result in undesired patterns. Insufficient setting time can cause colors to fade quickly. Also‚ avoid using high heat during washing‚ as it can damage the design. By steering clear of these errors‚ you ensure vibrant‚ long-lasting tie-dye results that stand out and retain their quality wash after wash.