The GE Oven Self-Cleaning feature uses high temperatures to burn away food residue, providing a convenient and efficient way to maintain your oven’s cleanliness and performance.
How the Self-Cleaning Feature Works
The self-cleaning feature uses high heat to burn away food residue and grime, offering multiple cleaning modes to accommodate different levels of cleaning requirements and oven conditions effectively.
2.1 High Temperatures Involved
GE self-cleaning ovens operate at extremely high temperatures, typically reaching around 880°F (471°C), to effectively burn away food residue and grime. These intense heat levels ensure that tough stains and grease are reduced to ash, simplifying the cleaning process. The high heat is crucial for breaking down organic material, making the self-cleaning feature both efficient and effective. It’s important to note that such high temperatures can cause the oven surfaces to glow red-hot during the cycle. This process usually takes several hours, depending on the level of cleaning required. The extreme heat also means that oven racks and certain parts may discolour or withstand the high temperatures, so proper preparation is essential. Always refer to the owner’s manual for specific temperature details and guidelines for your model.
- Avoid using commercial oven cleaners, as they can damage the finish.
- Ensure all racks are oven-safe for high-temperature cleaning.
- Keep the oven door closed throughout the cycle for safety.
2.2 Different Cleaning Modes Available
GE ovens offer multiple self-cleaning modes to accommodate different cleaning needs. The most common mode is the traditional high-heat cleaning, which uses temperatures around 880°F to incinerate food residue. Some models also feature a Steam Clean option, a lower-temperature setting that uses steam to loosen grime, making it easier to wipe away after the cycle. Additionally, certain models provide adjustable cleaning intensity, such as light, medium, or heavy-duty cleaning options, allowing users to customize the cycle based on the level of soiling. For convenience, some ovens also include a preset cleaning mode that automatically selects the optimal temperature and duration. To activate these modes, users typically press and hold the latch release button or turn the temperature knob to the “Clean” position. Always refer to the owner’s manual for specific instructions tailored to your oven model.
- Steam Clean is ideal for lighter messes and maintenance cleaning.
- High-heat mode is best for tough, baked-on food residue.
- Adjustable intensity options ensure efficient cleaning for all situations.
Safety Instructions for Using Self-Clean
3.1 Preparing the Oven for Cleaning
Before initiating the self-cleaning cycle, ensure the oven is properly prepared. Remove all racks, broiler pans, and cookware, as these should not remain during the process. Wipe up any excess food spills or debris to prevent smoke and odors. Do not use commercial oven cleaners, as they may damage the self-cleaning liner. Avoid covering any slots or openings, as this could interfere with the cleaning process. For models with a latch release button, ensure it is in the correct position. Always refer to your GE Oven manual for specific instructions tailored to your model. Proper preparation ensures a safe and effective cleaning cycle.
3.2 Safety Precautions During the Cycle
During the self-cleaning cycle, the oven reaches extremely high temperatures, posing significant safety risks. Never touch the oven surfaces or attempt to open the door while the cycle is active, as this can result in severe burns. Keep children and pets away from the oven at all times. Ensure proper ventilation in your kitchen, as fumes from burning food residue may be released. Do not introduce fresh air into the oven during the cycle, as this could cause a burst of flames. If you notice any unusual smells or smoke, turn off the oven and ventilate the area thoroughly. Always follow the instructions in your GE Oven manual to ensure safe operation. Failure to adhere to these precautions may lead to accidents or damage to your appliance.
3.3 Troubleshooting Common Issues
If the self-cleaning cycle malfunctions, immediately turn off the oven and disconnect the power supply. Contact a qualified technician for servicing, as improper handling may worsen the issue. If error messages appear, refer to the GE Oven manual for specific troubleshooting codes. Excessive smoke or fumes during the cycle may indicate improper preparation, such as leftover food debris or unremoved racks. Ensure the oven is empty and racks are taken out before starting. If the cycle takes longer than expected, check if the oven door is fully closed and latched. Avoid using commercial oven cleaners, as they can damage the oven’s interior. For lingering odors post-cycle, wipe the interior with a mild soap solution. If the self-cleaning feature does not start, verify that the door is securely locked and the controls are set correctly. Always follow the manual’s guidelines to resolve issues effectively and maintain your oven’s performance.
Using the Self-Clean Feature
Start the self-cleaning cycle by turning the oven knobs to the Clean position or selecting the appropriate setting on your GE oven model. For models with a latch release button, press and hold it while sliding into the clean position. Ensure the oven door is closed and latched securely before starting. The cycle uses high heat to burn away food residue. Follow the manual’s instructions for safe and effective cleaning, and avoid using commercial cleaners to prevent damage.
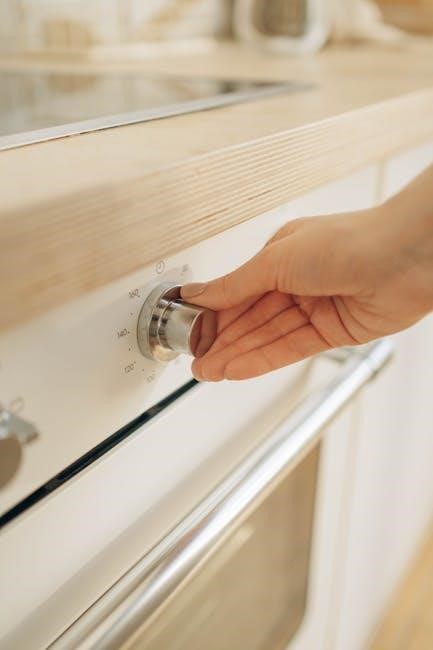
4.1 Starting the Cleaning Cycle
To begin the self-cleaning cycle on your GE oven, ensure all racks and cookware are removed. Close the oven door and verify it is securely latched; For models with a latch release button, press and hold it while sliding it into the clean position. On other models, turn the oven set and temperature knobs clockwise to the Clean setting; If your oven does not have a designated Clean position, select a high temperature. Some models may require you to press and hold the Clean button until it activates. Once the cycle starts, the oven will heat to a very high temperature, typically around 880°F, to burn away food residue. The duration of the cycle varies, ranging from 40 minutes to 2.5 hours, depending on the soil level and model. Always follow the instructions in your GE oven manual for specific guidance.
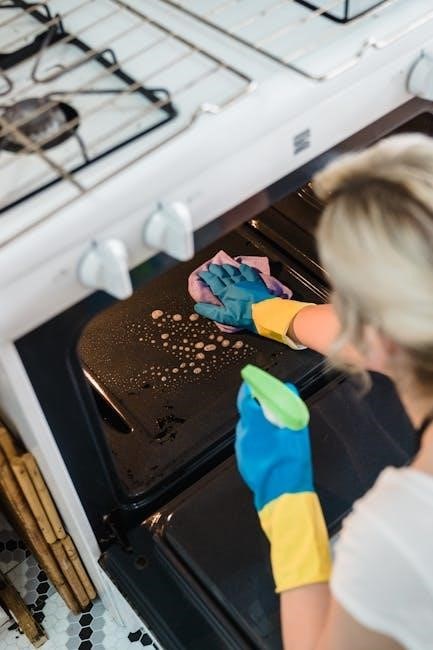
4.2 Post-Cycle Procedures
Once the self-cleaning cycle is complete, allow the oven to cool completely before proceeding. This is crucial for safety, as the oven surfaces will remain extremely hot. Open windows for ventilation to remove any lingering fumes. Use a soft cloth or paper towels to wipe away the ash and residue, which should be dry and powdery. Discard the residue carefully to avoid spreading it around. For tougher spots, a damp cloth can be used, but avoid scrubbing too hard to prevent damage to the finish. Clean the oven racks and shelves separately, either by hand or in the dishwasher, depending on their condition. Wipe the exterior with a damp cloth to remove any streaks or splatters. Avoid using abrasive cleaners, as they can damage the oven’s surfaces. Finally, ensure all parts are dry and in place before using the oven again for cooking.

Maintenance and Care Tips
Regularly wipe oven surfaces after use and avoid using abrasive cleaners. Clean racks separately and check for food residue buildup. Maintain the oven’s finish to ensure longevity and optimal performance.
5.1 Routine Cleaning and Upkeep
Regular maintenance is essential to keep your GE self-cleaning oven in top condition. After each use, wipe down the oven surfaces with a damp cloth to remove any splatters or spills. Avoid using harsh chemicals or abrasive cleaners, as they can damage the oven’s finish or harm the self-cleaning liners. For tougher stains, mix baking soda and water to create a paste, and apply it to the affected areas. Let it sit overnight before wiping clean. Always remove racks and place them in soapy water to soak, ensuring they remain free from food residue. Additionally, clean the oven door by wiping it with a mild detergent solution, paying attention to the edges where grime tends to accumulate. Regular upkeep prevents the buildup of grime and ensures the self-cleaning feature works efficiently. Consistent care also reduces the need for frequent deep cleans, keeping your oven looking and performing like new.
5.2 Caring for Oven Racks and Door
Proper care for your GE oven racks and door is crucial for maintaining their durability and appearance. Remove racks after each use and soak them in soapy water to loosen food residue. For tough stains, apply a mixture of baking soda and water, letting it sit before scrubbing. Avoid using abrasive cleaners or scouring pads, as they can damage the finish. The oven door can be cleaned with a mild detergent and warm water, ensuring no harsh chemicals are used. For glass windows, use a glass cleaner and a lint-free cloth to avoid streaks. Regularly wiping the door edges and hinges prevents grime buildup. After cleaning, rinse thoroughly and dry to prevent water spots. For racks, check if they are dishwasher-safe, as some models allow this convenience. By following these steps, you protect your oven’s components and ensure they remain in excellent condition for years. Regular maintenance also enhances the effectiveness of the self-cleaning feature.
The GE Oven Self-Cleaning feature is a powerful tool for maintaining a clean and efficient cooking environment. By utilizing high temperatures to burn away food residue, this feature simplifies oven maintenance while ensuring optimal performance. Always follow safety guidelines, such as keeping children away and avoiding commercial cleaners, to protect both you and your appliance. Regular upkeep, including cleaning racks and the oven door, further enhances the longevity and effectiveness of your oven. Remember to refer to your owner’s manual for model-specific instructions and troubleshooting tips. With proper care and use, your GE oven will remain a reliable and indispensable part of your kitchen for years to come. Embrace the convenience of self-cleaning and enjoy a cleaner, safer, and more efficient cooking experience.